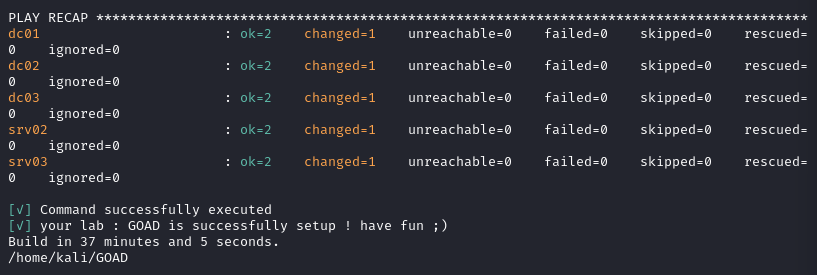
GOAD - Windows Setup
Introduction to GOAD
Game of Active Directory (GOAD),an open-source lab by Orange-Cyberdefense, is intended to “give PenTesters a vulnerable Active directory environment” to practice common AD attack tactics and techniques.
This blog post is one of three (3) I plan on posting, this being the initial setup and configuration for the lab. I utilized GOAD’s Install with VMware Windows configuration guide.
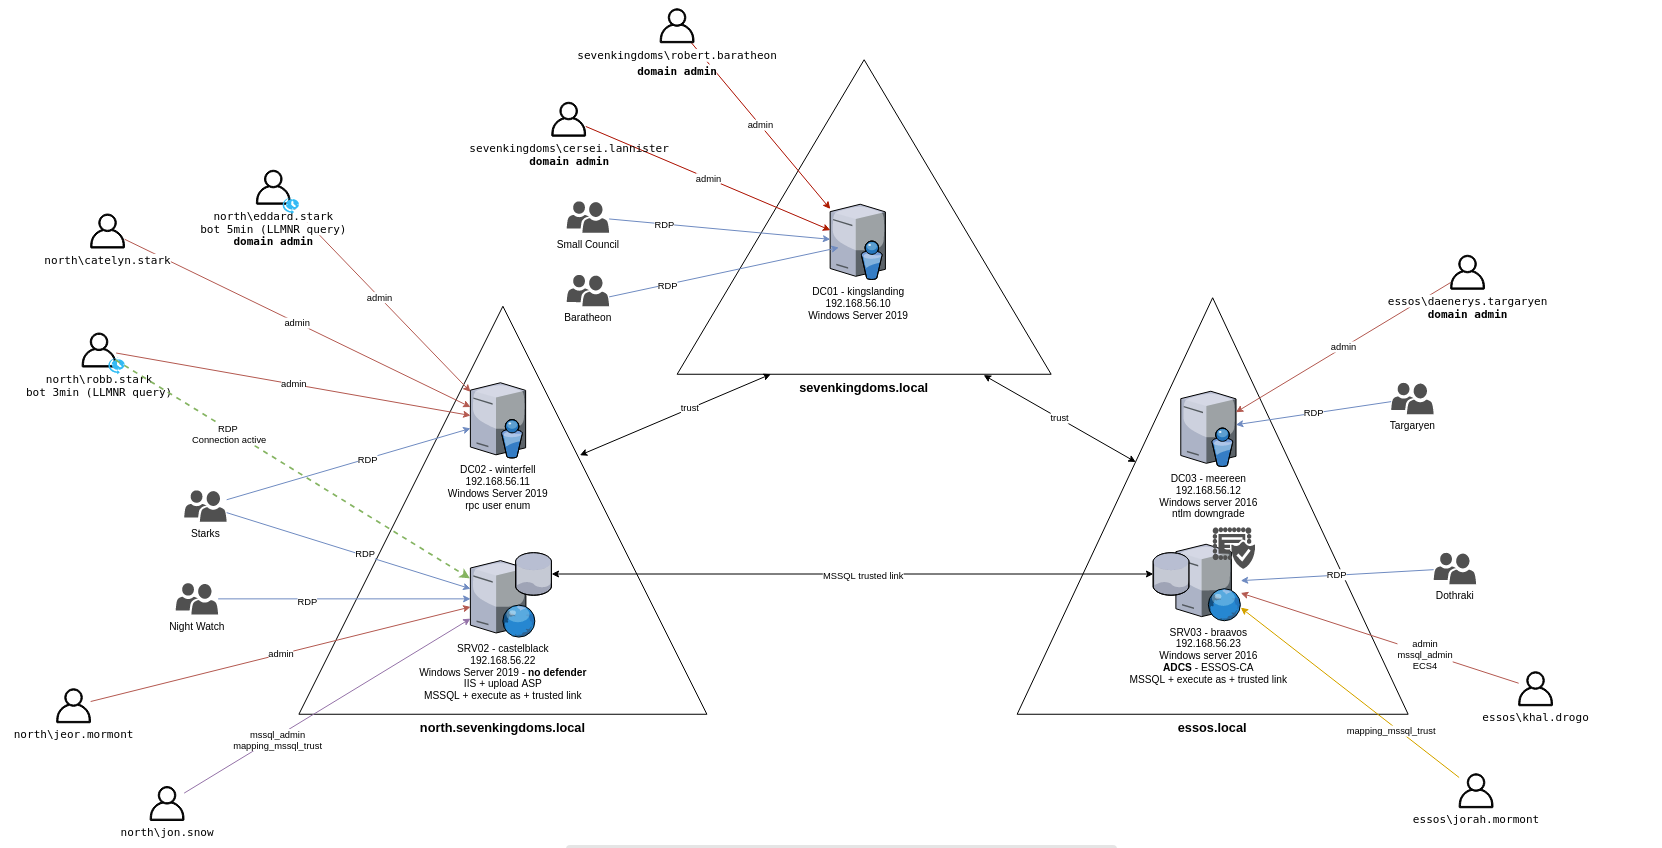
There are a few GOAD variations to choose from, but in this case, I decided to go with the full GOAD lab which consists of the following:
- 5 VMs
DC01 - 192.168.56.10
DC02 - 192.168.56.11
SRV02 - 192.168.56.22
DC03 - 192.168.56.12
SRV03 - 192.168.56.23
2 Forests
3 Domains
General Requirements:
- Space: ~115gb (roughly, more for snapshots).
- Kali Linux VM (2023.3-vmware-amd64)
- RAM (32/gb On my System) ~ 2gb per GOAD VM
Windows Necessary Installations
Prior to performing the configurations and additional installations there are a few necessary tools to have downloaded on our Windows system.
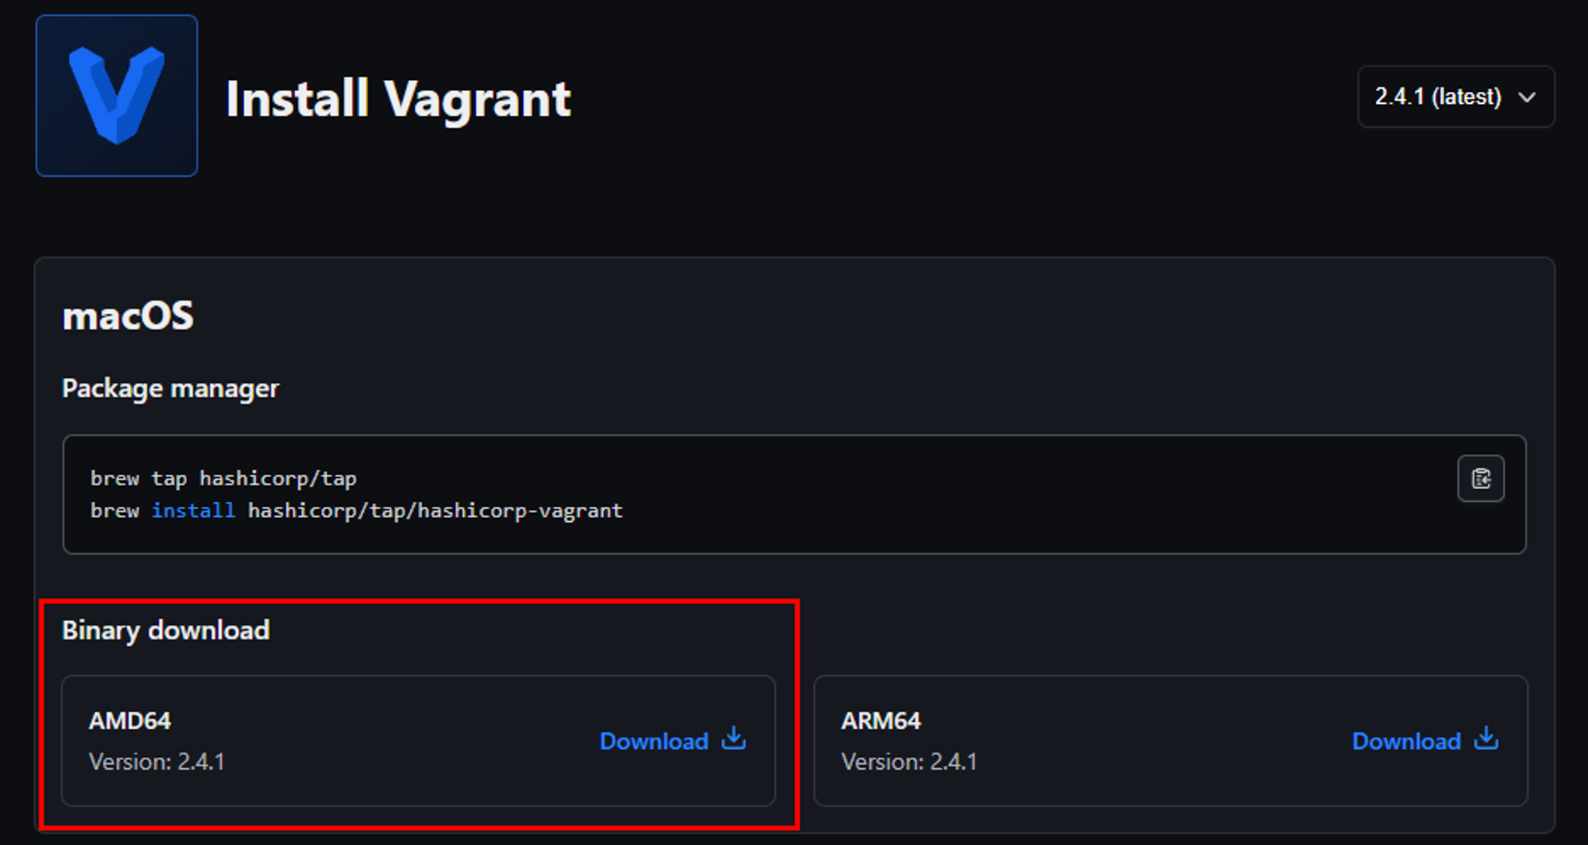 Vagrant Windows Install Screenshot
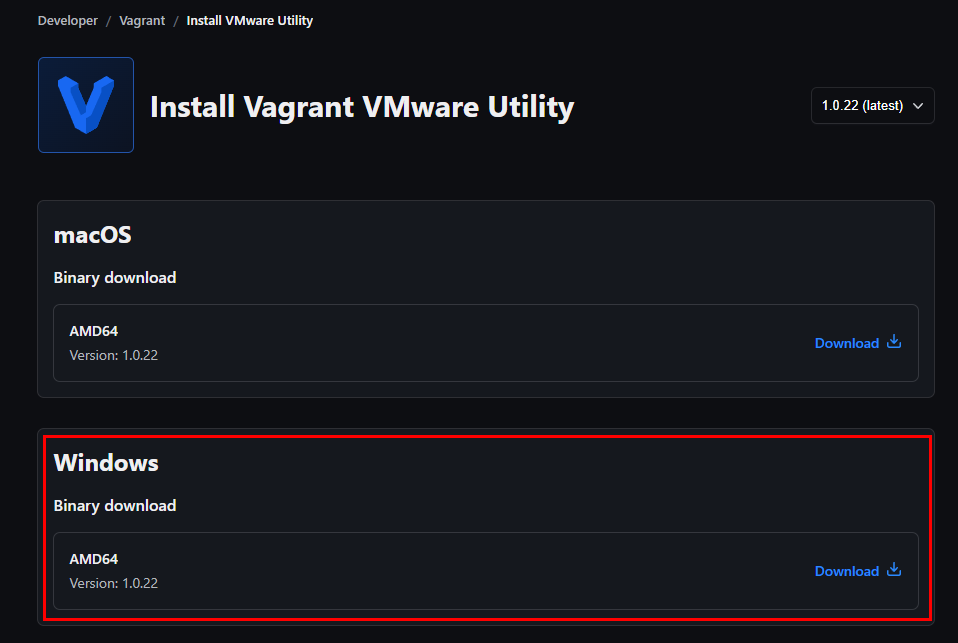 Vagrant VMware Utility Driver Install Screenshot
- Vagrant Plugins: Once the necessary Vagrant installs have completed and a reboot of the PC, we need to install two (2) vagrant plugins.
To accomplish this start a PowerShell session with Administrator level privileges and run the following commands:
1
2
vagrant plugin install vagrant-vmware-desktop
vagrant plugin install vagrant-reload
 Vagrant Plugin Install Screenshot
Kali VM Network Interface Card Configuration
The Kali Linux VM we are using to configure the VMs using Ansible needs two network interface cards (NIC)s configured:
- NAT/Bridge Adapter for Internet Connection
- Custom Adapter for connecting to GOAD Subnet (192.168.56.0 /24)
For this purpose, we will use VMware’s Virtual Network Editor.
1. Power on Kali Linux VM
2. Add Second Adapter
We must first add a second network adapter within the Hardware Wizard: VM -> Settings -> Hardware -> Add -> Network Adapter. Select finish once you have selected Network Adapter as seen in the screenshot below: 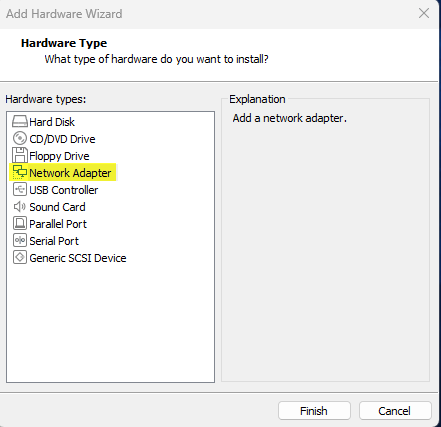 Adding 2nd Network Adapter
3. Configure Newly Added Adapter
We then need to properly configure the newly created Network Adapter to connect within the GOAD’s netmask. To accomplish this enter the VMware’s Virtual Network Adapter: Edit > Virtual Network Editor. Then select “Change Settings” to allow configurations.
Select “Add Network” and choose one of the VMnet# options, in this case, VMnet2 is utilized. Then configure VMnet2 to align with the GOAD netmask. Reference the screenshot below for the configurations made. 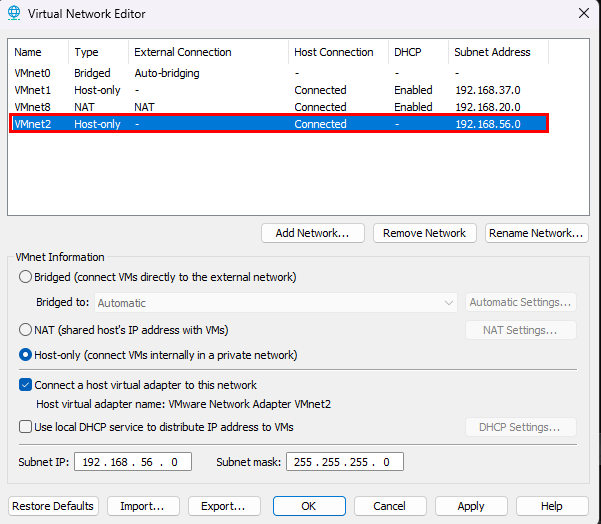 VMnet2 Configured
4. Select VMnet2 for Network Adapter 2
Within the Kali Linux VM’s Virtual Machine Settings, we need to change “Network Adapter 2” to use the newly configured VMnet2. Reference the below screenshot to accomplish this.
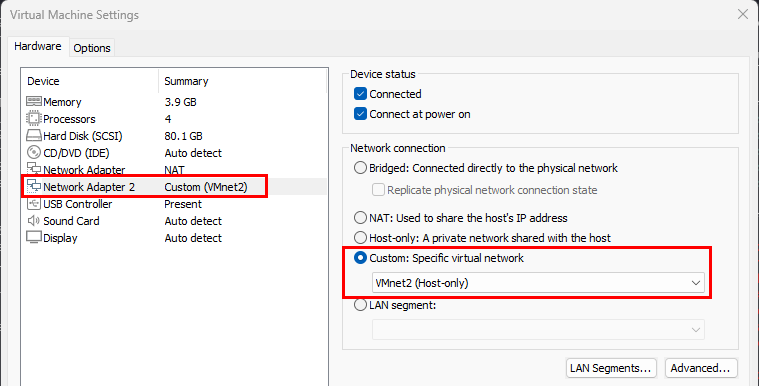 Kali VM Network Adapter 2 Changed
The secondary network interface should now be listed in our Kali VM.
NOTE: The same step (4. Select VMnet2 for Network Adapter 2) needs to be re-produced on the five GOAD VMs once they are deployed
5. Assign Static IP Address
The GOAD lab guide does not specify what address(es) are assignable within the range, but we know the five (5) VM IPs. In this case I choose to assign the Kali Linux VM 192.168.56.250 as the IP address within the GOAD subnet. Reference this article, by Vivek Gite, which walks through how to set a static IP address on Debian.
First, create a copy of the original /etc/network/interfaces configuration file with sudo cp /etc/network/interfaces /root/
Then enter the following configuration into /etc/network/interfaces:
1
2
3
4
5
6
# GOAD Interface Configuration
auto eth1
iface eth1 inet static
 address 192.168.56.250
 netmask 255.255.255.0
 gateway 10.193.72.1
NOTE: the gateway is set to the default gateway for the Bridge Adapter used for internet access
Once the above has been configured accorindgly, we need to restart the Network service with sudo systemctl restart networking.service. Then ensure that the Network Adapter 2 has the assigned static IP address: 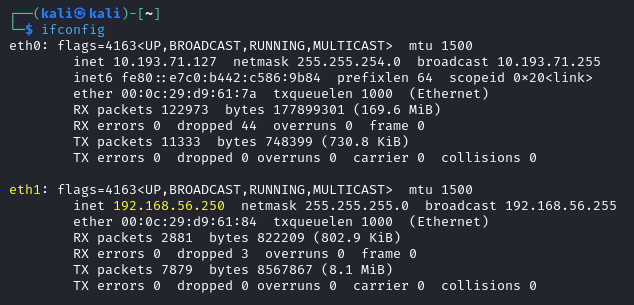 Network Adapter 2 Static IP Address
Internet Access Issues
After configuring the above I was having issues with accessing the internet and pinging the Bridged Adapter’s default gateway. In this case, the pings were coming from my Network Adapter 2’s IP address:  Failed Gateway Pings
The source of the issue is a default route added to my routing table, which can be viewed with the ip route command.
To remove this conflicting default route I used the sudo ip route del default via 10.193.72.1 dev eth1 command. Once this was completed the pings and internet access were successful. 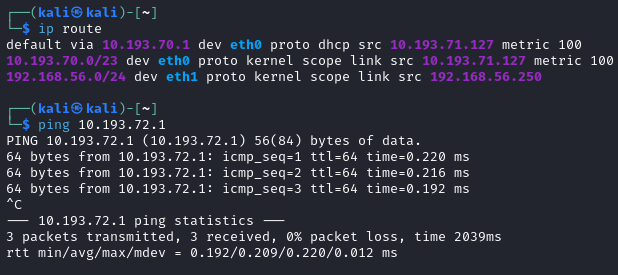 Successful Pings
Install Ansible and Dependencies
On the Kali Linux VM we can no move onto installing Ansible and the necessary dependencies. Run the following set of bash commands (I personally just put them all in bash script).
1
2
3
4
5
6
pip install --upgrade pip
pip install ansible-core==2.12.6
pip install pywinrm

sudo apt install sshpass lftp rsync openssh-client
git clone https://github.com/Orange-Cyberdefense/GOAD
Ansible Requirements
Once the above has been successfully executed we can move onto installing the ansible requirements from GOAD’s ansible/requirements.yml file. Run the following command from the GOAD repository’s directory:
1
2
┌──(kali㉿kali)-[~/GOAD]
└─$ ansible-galaxy install -r ansible/requirements.yml
Upon initially attempting this command I recieved the AttributeError: module 'lib' has no attribute 'X509_V_FLAG_NOTIFY_POLICY' error output: 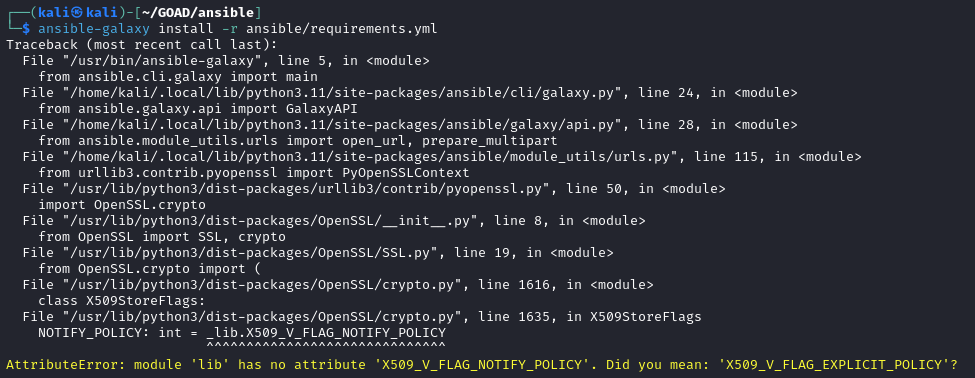 Ansible Requirements Error
Upon researching this error output it seems linked to a Conda Attribute Error. The fix is to run pip install pyopenssl==24.0.0. Upon successful execution of this command re-run the ansible-galaxy command. It should succeed without failure:  Ansible Successful Requirements Installation
Setup VMs w/Vagrant
The next step is to utilize vagrant to deploy and perform the initial setup of the VMs. In this case, we need to clone the GOAD repository to our Windows system. Then, in an Administrator PS, session enter the following commands:
1
2
cd .\ad\GOAD\providers\vmware
vagrant up
Upon initial execution I got an error stating The host only network with the IP '192.168.56.10' would collide.  VirtualBox Ethernet Adapter Conflict
Upon examining all of my network interfaces in CMD with ipconfig /all I noticed a VirtualBox Host-Only Ethernet Adapter. 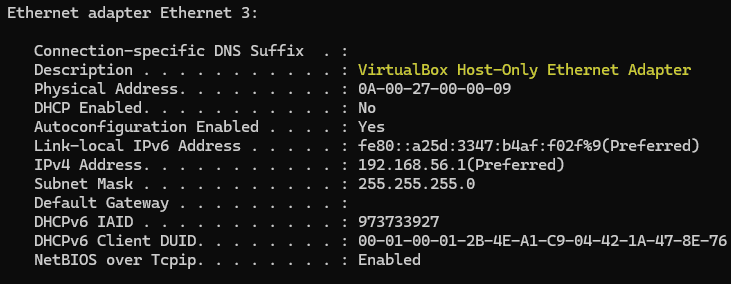 VirtualBox Ethernet Adapter Details
Disable VirtualBox Ethernet Adapter
I choose to disable this interface under Windows Settings -> Network & Internet -> Advanced Network Settings -> Ethernet 3 -> Disable. After disabling this conflicting ethernet adapter I re-ran the vagrant command and it executed successfully. 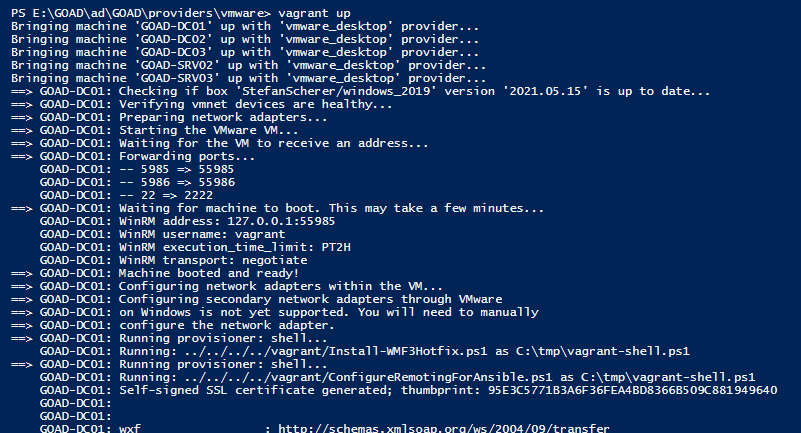 Vagrant Successful VM Setup
After vagrant completes the entire process there should now be five (5) GOAD-* VMs started within VMware.  GOAD VirtualMachines Deployed
Deploy Ansible to Build VMs
1. Create Python Virtual Environment
The first step is to create a Python Virtual Environment by launching the following command:
1
2
┌──(kali㉿kali)-[~/GOAD/ansible]
└─$ python3 -m virtualenv ./.venv && source ./.venv/bin/activate
NOTE: Launch from within the GOAD/ansible/ directory
We should then see (.venv) in front of our Shell Prompt:
2. Build VMs
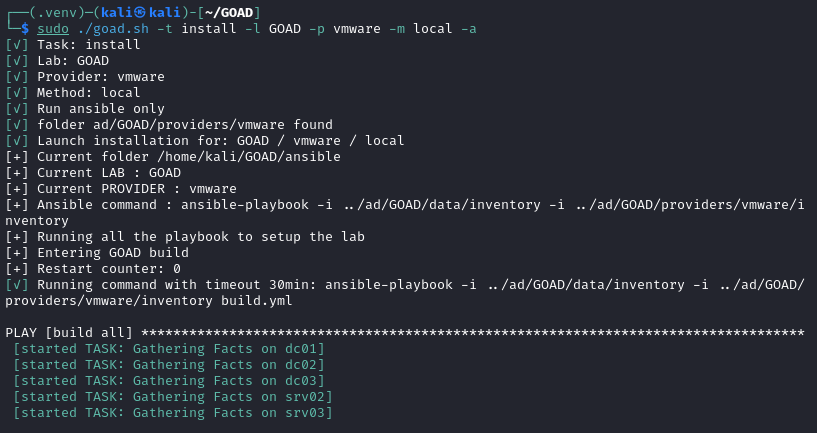
Once we have launched a Python Virtual Environment we can deploy the goad.sh script which utilizes ansible to build the GOAD VMs. Execute the following command to successfully build the VMs:
1
2
┌──(.venv)─(kali㉿kali)-[~/GOAD]
└─$ sudo ./goad.sh -t install -l GOAD -p vmware -m local -a
Trouble Shooting Errors
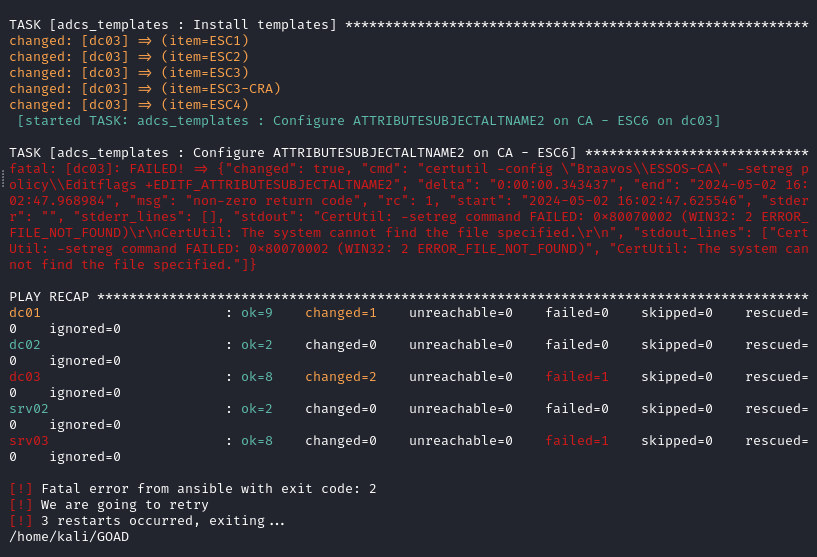
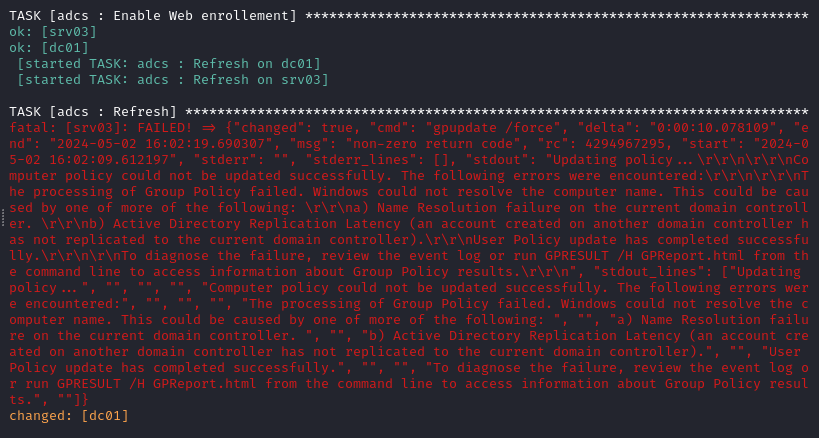
After letting the entire ansible deployment finish there were three (3) errors. One on DCO1 executing the [setting/enable_nat_adapter : enable interface Ethernet0] task, one on DC03 executing the adcs_template : Configure ATTRIBUTESUBJECTALTNAME2 on CA - ESC6] task, and finally one on SRV03 executing the [adcs : Refresh] task.
- DC01 Issue
Was unsure of what exactly occurred with this error, but I didnt change anything. After fixing the other two errors and re-running the VM build the error did not show up again.
- DC03 ADCS Issue
With the help of ChatGPT and the error output I attempted to troubleshoot the following error on DC03.
I was given this command to execute on DC03: reg add "HKLM\SOFTWARE\Microsoft\Cryptography\Services\Braavos\ESSOS-CA\Policy" /v EditFlags /t REG_DWORD /d 1 /f. I logged into DC03 with Vagrant \\ Vagrant (username \ password), started an Administrator Active Directory Module for Windows PowerShell, and executed the reg add command.
- SRV03 GPO Update Issue
Reference the following for the error output on SRV03:
The error output is suggesting that Ansible attempted to run a Group Policy Object (GPO) update and it failed. I logged into the SRV03 VM with Vagrant \\ Vagrant (username \ password), started an Active Directory Module for Windows PowerShell session, and executed the gpudate /force command manully, and it showed successful execution.
NOTE: I also changed SRV02 && SRV03 ICMP Inbound Firewall Rules to allow for Pings
Re-Launching Ansible Build
After attempting to fix the above three (3) errors, I re-ran the goad.sh script. This time there were no errors during the building process.

